entertechpro Toy Car Guide: Program Phone Screen Buttons
IEM RoboticsTable of Content
-
Technical Foundations for Your Wireless Toy Car Assembly
-
Simple Steps to Establish Your Local Bluetooth Connection
-
Linking a Touchscreen Slider to Regulate Motor Velocity
-
Interfacing Advanced Sensors for Smart Path Tracking
- Safeguarding Your Mobile Power Resource Units Long-Term
- Conclusion
- Frequently Asked Questions
entertechpro hardware guidelines offer an excellent foundation for beginners eager to bridge the gap between digital mobile applications and physical machinery. Building custom automation setups no longer requires decades of complex industrial experience or highly expensive laboratory gear. Instead, creating an interactive command interface allows hobbyists to explore the practical fundamentals of wireless machine communications seamlessly. Utilizing an everyday smartphone screen as a localized control station turns a basic toy into an intelligent engineering project. This entry-level training manual breaks down how to construct responsive graphical layout switches for smart hardware manipulation. Consequently, following these structured integration steps empowers young builders to direct real-world mechanical movements with a simple tap on a glass panel.
Developing interactive applications alongside the entertechpro methodology simplifies the way code parameters travel from a handheld screen to a physical motor unit. This step-by-step tutorial focuses on linking mobile touch inputs to small, low-voltage electronic receiver chips tucked inside a miniature chassis. As a result, operators can watch their programming instructions translate into immediate wheel movements without facing technical delays. Furthermore, mastering these core hardware connectivity principles builds the direct skills required to design larger automated smart home networks. Every successful automation routine depends on establishing a stable, lag-free signal pipeline between the user panel and the physical gears. The simple sections below provide a highly descriptive roadmap to guide you through your first phone-controlled mechanical build.
Technical Foundations for Your Wireless Toy Car Assembly
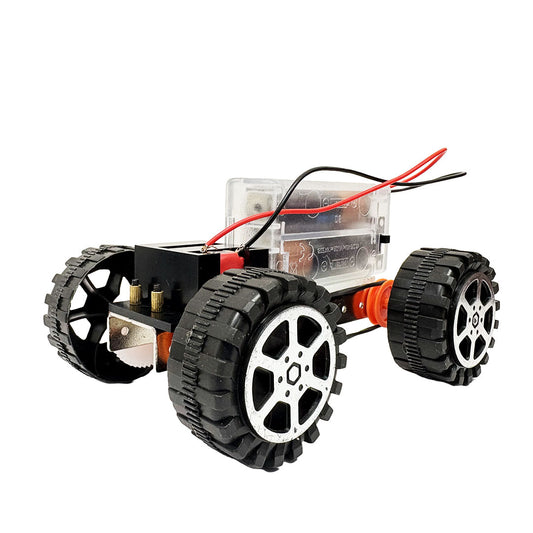
Assembling an app-driven vehicle requires a balanced combination of basic computing nodes, low-voltage power units, and physical drive actuators. The underlying project architecture must allow the onboard receiver module to capture incoming smartphone command strings instantly over local wireless bands. Builders should gather their primary assembly elements on a clean workbench before starting internal connection routines.
Essential Components for the Physical Vehicle Setup
● Microcontroller Processing Board: This compact computing chip reads incoming wireless code bytes to adjust voltage levels across the wheels.
● Wireless Serial Transceiver: A small radio board establishes a continuous local network bond with your mobile device.
● Chassis and Wheel Frame: A lightweight plastic structural body houses your electronic circuits and protects the internal components.
Structuring Your Assembly with Workshop Tools
Assembling the physical base of the vehicle involves securing individual motor blocks firmly to your structural plastic plates. Tech-savvy builders frequently reference a professional workshop drill machine blueprint to ensure perfect alignment when boring structural holes for axel rods. Creating clean mounting spaces prevents unnecessary mechanical vibrations from loosening delicate circuit contacts during high-speed travel tests.
Simple Steps to Establish Your Local Bluetooth Connection
Establishing communication lines involves utilizing the specialized interface layouts popularized by the entertechpro community to bond your handheld terminal with the car. The application sends short text packets across localized radio frequencies to trigger corresponding changes in the physical motor pins. This lightweight transmission loop guarantees that your mechanical setup responds to screen commands within milliseconds.
Wireless Pairing and Binding Sequence
- Power up the toy car circuit board to activate the small onboard wireless communication indicator lamp.
- Launch the custom controller application on your smartphone and activate your device's local radio tracking system.
- Select the vehicle's unique hardware address string from the visible device directory map to lock the connection.
Designing the Interface Layout Tree
- Arrange a large graphical icon button on your mobile layout screen to serve as the master ignition toggle switch.
- Nest a linear drive container area directly below the main switch to separate auxiliary controls from primary movement pads.
- Assign a distinct resource identification tag to the digital interface components to avoid internal application code errors.
Linking a Touchscreen Slider to Regulate Motor Velocity
Regulating toy vehicle velocities requires converting dynamic touchscreen finger gestures into precise numeric variable outputs inside your software script. The entertechpro approach highlights using simple scaling math to change a zero-to-one-hundred screen position into a matching electrical output level. This scalable value determines the exact volume of current flowing toward the propulsion mechanism.
● Read Slider Position Logs: The app tracks your finger position on the glass to update numeric speed parameters instantly.
● Transmit Compressed Speed Packages: The system packages the variable values into a brief character string to prevent network lag.
● Adjust Output Pin Voltages: The car processing chip reads the speed numbers to modify the electrical flow rate.
Regulating Mechanical Rotational Elements
Controlling large physical components requires intermediate knowledge regarding how electric currents convert into physical kinetic torque forces. The local processing board routes variable voltage levels toward a standard dc motor assembly to spin the toy car wheel smoothly. Implementing simple software loop boundaries prevents these mechanical drive systems from spinning out of control during rapid trajectory adjustments.
Interfacing Advanced Sensors for Smart Path Tracking
Advanced automation systems reach their full potential when digital remote controls pair smoothly with automatic ambient scanning units. Integrating basic proximity monitors directly into your vehicle framework alongside your entertechpro button maps creates an automated collision avoidance safety net. The smartphone handles main steering commands, while local hardware sensors block movements that threaten vehicle safety.
● Proximity Distance Detection: Integrating an affordable ir sensor onto the front bumper allows the vehicle to detect upcoming obstacles using invisible light waves.
● Automated Emergency Braking: The onboard code drops propulsion power instantly when tracking sensors detect a wall under thirty centimeters away.
● Live Telemetry Feedback Logs: Distance measurements transmit back to your phone layout screen to keep operators updated on surrounding terrain conditions.
Safeguarding Your Mobile Power Resource Units Long-Term
Handheld controller rigs and motorized toy projects demand continuous, well-balanced electrical distribution frameworks to survive long operational learning loops. Shifting heavy analytical calculations away from your portable electronics prevents rapid battery drain issues during intensive field tests. Maintaining optimized charging profiles keeps your processing units running cool under heavy motor acceleration cycles.
Energy Preservation Systems for Portable Projects
● Active Voltage Drain Checks: The application code tracks the current consumption rates of your kinetic actuators continuously.
● Electrochemical Lifecyle Monitoring: Special diagnostic meters trace the remaining power capacity inside your lithium battery block accurately.
● Automated Diagnostic Sleep Modes: The central processor drops internal radio modules into low-power states when touch inputs cease for five minutes.
Conclusion
Pioneering your first app-driven toy car project through the entertechpro instructional framework provides a remarkably clean path into the world of robotics. Merging graphical layout buttons, fluid speed sliders, and basic wireless radio chips demonstrates how easily software commands control physical machinery. Prioritizing systematic component layouts, maintaining low-latency communication links, and monitoring onboard battery blocks ensures long-term hardware reliability. Budding engineers can easily modify these basic wireless principles to build complex automated gadgets over time.
Utilizing clean, standardized button-mapping steps guarantees that your smartphone control dashboard interfaces correctly with external processing units without technical faults. The reliable execution of an optimized entertechpro project pathway bridges the gap between digital display screens and real mechanical execution loops. By keeping your hardware connections neat and applying straightforward programming scripts regularly, DIY builders eliminate common signal failures completely. Ultimately, combining basic touchscreen layout design with careful motor management empowers everyday technology enthusiasts to create physical automation projects with absolute confidence.
Frequently Asked Questions
What type of wireless module is best for an entertechpro beginner car?
A basic, low-power Bluetooth serial pass-through card is perfect because it pairs effortlessly with almost all modern smartphone apps.
How does the digital screen slider make the toy car wheel spin faster?
Moving the slider increases a numerical value in the app, which prompts the car's chip to route more electrical voltage to the wheel.
Why does the toy vehicle disconnect when the drive motor starts up?
Sudden spikes in current draw from the motor can cause temporary power starvation on the receiver chip, forcing a system reset.
Can an ir sensor help the toy car avoid walls automatically?
Yes, mounting an infrared detector allows the vehicle to read obstacle reflections and cut motor power before a collision occurs.
Is a standard lithium battery safe for powering small hobby motors?
Yes, a regulated lithium cell provides excellent, steady energy, provided you use an inline protection circuit to prevent over-discharging.

By: Asmita Ghosh