Use Your iphone 16e to Record Great STEM Projects
IEM RoboticsTable of Content
-
Setting Up Your Smartphone Recording Station
-
Capturing Your STEM Work with Simple Angles
-
Creating Engaging Video Formats for School
-
Essential Safety Habits for Young Filmmakers
- Keeping Liquids Far Away
-
FAQs
The iphone 16e is a fantastic tool that students can use to record their creative science and engineering achievements. Many young minds build incredible working models at home, but they often struggle to showcase their results to teachers. Fortunately, you do not need an expensive setup to make your school assignments look like professional documentary films. This compact device provides an easy way to capture high-quality videos without any complicated gear or technical hassle. Therefore, learning to use your daily phone effectively turns simple homework into an engaging visual presentation for classrooms.
Furthermore, using this streamlined handset allows children to focus completely on their experiments rather than dealing with heavy technology. Complex lens adjustments can easily confuse young students who just want to show their working robotic designs. The basic layout of this phone removes all unnecessary confusion, making video creation accessible to everyone globally. Consequently, tracking your educational growth becomes a fun, interactive part of the actual building process. This straightforward approach encourages students to share their scientific discoveries confidently with a much wider audience.
Setting Up Your Smartphone Recording Station
Before hitting the recording button, preparing a steady base ensures your final presentation remains perfectly steady and beautiful.
Keeping the Camera Steady
A shaky screen instantly distracts viewers from watching your cool engineering projects run smoothly. Therefore, you must find an affordable way to lock your phone in one place during recording. You can purchase a budget tripod or simply build a custom holder using thick cardboard sheets. If you are building automated mechanisms, you can use a budget 3d printer to create a custom plastic phone cradle. Keeping the phone locked down allows your hands to remain completely free to operate your project parts.
Finding the Best Lighting
Good visibility makes a massive difference when you want to show small moving components clearly to your classmates. Place your experiment table near a large, bright window to utilize free natural sunlight during the day. If you are working late at night, position a household desk lamp directly over your project area. Avoid pointing the light source straight into your camera lens to prevent heavy shadows or bright blind spots. For specific color and shadow experiments, adding a steady led light nearby helps illuminate the tiny tracking lines.
Capturing Your STEM Work with Simple Angles
Choosing where to position your phone screen helps explain how your physical mechanism operates without using words.
The Over-the-Shoulder Angle
Place the smartphone slightly behind your shoulder, pointing downward toward your hands on the desk. This visual choice helps the audience view the assembly steps exactly the way you see them while working. It works perfectly for showing how to join wires or configure small structural components on a baseboard. Consequently, your teacher can easily follow along to verify that you followed the safety guidelines correctly.
The Close-Up Technical Shot
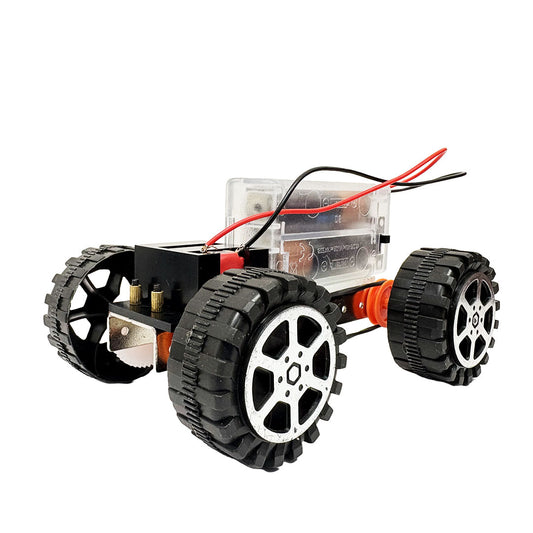
Move the smartphone lens closer to the most critical interactive sections of your science model. The lone camera on this device features an excellent focus system that handles close distances better than bulkier hardware. This feature lets you show how gear teeth mesh or how small indicator bulbs change colors during operation. For instance, if you are testing an automated sensor circuit, a detailed close-up shot captures the exact moment the system triggers. You can use a digital multimeter price guide to check power flow while filming these detailed interactions.
Creating Engaging Video Formats for School
Different scientific assignments require unique video styles to convey the data effectively to your teachers.
Fast Time Lapse Videos
This recording mode is exceptional for showing slow environmental processes that take several hours to complete. For example, you can document a chemical reaction or watch how water evaporates from a container over time. Secure your smartphone on its stand and plug the charging cable directly into a wall power outlet. Select the time-lapse option in the camera app settings and let the device run without interruption. This strategy condenses an entire afternoon of physical changes into a brief, exciting clip for your class.
Slow Motion Demonstration Videos
High-speed action projects require the opposite approach to capture the fine details of rapid movement. Use the slow-motion feature when filming a model car launching or a small mechanical arm tossing an object. This setting stretches a single second of fast motion into a smooth, detailed sequence on the screen. Consequently, students can analyze the exact path of movement to see where their designs might need adjustment. It transforms a blink-and-you-miss-it moment into a highly valuable learning experience for the whole classroom.
Essential Safety Habits for Young Filmmakers
Protecting your electronics and your workspace ensures that your educational filming experience stays completely safe.
Safeguarding the Device
Always slip a thick, shockproof bumper case onto your smartphone before placing it near your workspace. Active science areas often involve tools that can easily scratch glass or dent polished aluminum frames. This simple precaution ensures the handset remains fully protected against accidental drops from high desks. Never leave the device balancing precariously on the edge of a table where moving project parts might strike it.
Keeping Liquids Far Away
Water and delicate internal phone circuitry do not mix well during hands-on science work. If your experiment requires liquids, position the phone far away from the splash zone. Use the digital zoom tool on the screen to get a closer view instead of physically moving the phone near water. This safe distance keeps your electronics dry while allowing you to capture every detail perfectly.
The iphone 16e provides all the necessary imaging power to turn simple school science assignments into cinematic stories. By utilizing basic lighting tricks and steady stands, students can easily produce excellent presentation media at home. This practice builds great communication skills alongside technical engineering knowledge.
In conclusion, mastering the camera on your iphone 16e helps you share your learning path with the world. You do not need expensive production gear to make your robotics creations look absolutely spectacular on screen. Grab some cardboard, set up your workspace, and start documenting your amazing discoveries today.
FAQs
Can I shoot high-quality video using just one lens?
Yes, the powerful single camera captures stunning details that look great on large classroom screens.
How do I prevent the phone battery from dying while filming?
Keep your device connected to a charger during long recording tasks like time-lapse videos.
Do I need an expensive tripod for steady videos?
No, a steady stack of heavy textbooks or a cardboard box works perfectly fine.
What is the easiest way to edit my project clips?
You can use free mobile apps to cut your videos and add simple text labels.
Should I use the front or back camera for projects?
Always use the rear camera because it offers much better clarity and sharper focus for details.

By: Asmita Ghosh