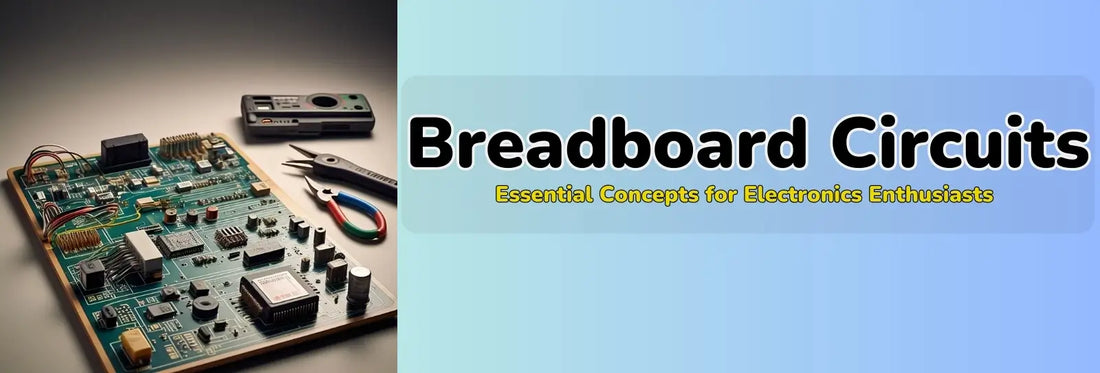
Breadboard Circuits Essential Concepts for Electronics Enthusiasts
IEM RoboticsTable of Content
-
What is a Breadboard
-
Types of Breadboards
-
Breadboard Structure
-
Functions of a Breadboard
-
Breadboard and Jumper Wires: How Do They Work Together?
-
Applications of Breadboard Circuits
- Conclusion
Breadboard circuits are necessary for all those individuals interested in electronics - specifically beginners, hobbyists, and professionals alike. It provides for the easy prototyping and testing of circuits without soldering. Breadboards are versatile reusable platforms that allow anyone to create, modify, and experiment with electronic circuits quickly and efficiently.
A breadboard is a crucial tool in electronics for anyone whether a beginner, or, an expert designing complex systems. An arrangement would make the main components, such as resistors, capacitors, transistors, integrated circuits, etc., connected through wires to facilitate education and experimentally prototyping.
This guide provides a comprehensive overview of breadboard meaning, its components, the effective use of jumper wires, and a step-by-step tutorial on constructing a breadboard circuit.
By the end of this guide, you should have a firm grasp of how to apply these concepts to electronics development and innovation
What is a Breadboard
A breadboard is a square board with tiny holes where electronic components are inserted and connected with jumper wires. It allows for the quick assembly and alteration of circuits without having to make permanent connections, making it an invaluable aid in electronics experimentation and prototyping.
Breadboard Definition
A breadboard is a reusable base for constructing electronic circuits. It comprises several interconnected sockets or tie points arranged systematically to store and connect electronic components like resistors, capacitors, diodes, and integrated circuits (ICs).
The internal connections of a breadboard generally come in horizontal and vertical strips for adequate wiring and circuit design.
Breadboards are also extensively utilized in prototyping and learning projects because they do away with soldering, allowing for quick changes and adjustments to circuit designs.
They are available in different sizes, ranging from minor versions for small projects to larger boards that can handle more intricate circuit designs. They are also valuable learning devices for students and engineers, allowing them to visualize and test circuit functions before finalizing a permanent design.
Types of Breadboards
● Solderless Breadboard: A solderless breadboard is the most common type of rapid prototyping. This type of board consists of a plastic board with internal metal clips that hold components in place without requiring soldering. The board has rows and columns of holes into which electronic components and jumper wires can be inserted. It allows easy modifications and is reusable, making it ideal for experimenting with different circuit designs.
● Stripboard (Veroboard): A stripboard, also known as a Veroboard, is a perforated board with copper tracks running in one direction. It requires soldering to make electrical connections. The copper strips can be cut to customize circuit pathways, making it helpful in building permanent or semi-permanent circuits.
Breadboard Structure
A breadboard circuit consists of several key sections, each serving a specific purpose in circuit assembly:
1. Power Rails: Power rails are located along the sides of the breadboard and distribute electrical power throughout the circuit. They are typically marked with red, blue, or black lines, representing the positive (VCC) and negative (ground) terminals. Connecting a power source to these rails allows components on the board to receive the required voltage.
2. Terminal Strips: Electronic components such as resistors, capacitors, and integrated circuits (ICs) are placed on the terminal strip. The strip contains multiple rows of interconnected tie points, making it easy to establish electrical connections. ICs are commonly positioned across the center gap, allowing each pin to be wired independently.
3. Tie Points: Tie points refer to the small holes on the breadboard where components and jumper wires are inserted. These holes are internally connected in groups, allowing electrical signals to pass through without requiring direct wire connections. The vertical columns in the terminal strip are typically connected in groups of five, enabling efficient circuit design.
4. Jumpers and Interconnections: Jumper wires interconnect different sections of the breadboard. These flexible wires help route signals, connect power rails to the terminal strip, and link various components to create a functional circuit. Users can easily modify circuit designs by rearranging jumpers without making permanent changes.
Functions of a Breadboard
Breadboard circuits play a crucial role in electronics by providing a reusable and flexible platform for designing, testing, and modifying circuits. Below are the three primary functions of a breadboard:
1. Prototyping Circuits
One of the main applications of a breadboard is prototyping circuits. Engineers, hobbyists, and programmers utilize breadboards to create and test electronic circuits before making a permanent design. In contrast to soldered circuits, which involve permanent connections, breadboards enable users to make adjustments easily by reconfiguring components and wires.
This is particularly helpful in product design, where it is essential to test various circuit configurations before designing a printed circuit board (PCB). Breadboards allow engineers to verify the functionality of their designs, detect potential problems, and maximize performance before proceeding with production.
2. Learning and Experimentation
Breadboards are a vital learning tool for students, hobbyists, and electronics enthusiasts. Learning electronics concepts such as voltage, current, resistance, and circuit design is more straightforward when students can create real-world circuits by hand.
Since breadboards do not involve soldering, they offer a safe place to experiment with various configurations.
Electronics teachers usually employ breadboards within laboratories and classrooms to instruct students on how to wire components, use resistors and capacitors, and build circuits that work. The practical exposure assists learners in comprehending how electrical components interact and how to diagnose problems once a circuit fails to work as anticipated.
3. Troubleshooting and Circuit Testing
Breadboards offer a neat approach to troubleshooting electrical circuits. Technicians and engineers can use them to reproduce the circuit and identify faulty components when an electronic device or project does not work correctly. Because changes can be easily implemented, troubleshooting is more efficient and quicker than a permanently soldered circuit. This makes breadboards essential tools for troubleshooting and fixing electronic problems before design completion.
Breadboard and Jumper Wires: How Do They Work Together?
Breadboard and jumper wires are essential elements of electronics prototyping. A breadboard is a platform for circuit assembly, while jumper wires provide the connections to create electrical paths between parts. Functional circuits on a breadboard would be impossible to make without jumper wires. Flexible, insulated jumper wires enable users to connect various circuit parts without soldering, making modifying and experimenting with circuit designs easy.
Types of Jumper Wires
Jumper wires come in different types, each designed for specific applications:
1. Male-to-male jumper Wires: These have metal pins on both ends and are primarily used for connecting two points on a breadboard. They are the most common type for circuit prototyping.
2. Male-to-Female Jumper Wires: These have a metal pin on one end and a female socket on the other. They are ideal for connecting a breadboard to external modules, such as sensors and microcontrollers like Arduino or Raspberry Pi.
3. Female-to-Female Jumper Wires: These wires have sockets on both ends and help link external modules without using a breadboard. They are commonly used to connect sensors and modules directly to microcontrollers.
How to Make Breadboard Jumper Wires?
With the help of below steps, you can create reliable and reusable jumper wires for any breadboard project.
If you need custom jumper wires for your circuit, follow these simple steps:
1. Cut a length of insulated wire – Choose an appropriate length based on your circuit’s layout.
2. Strip the insulation from both ends – Use wire strippers to expose about 5mm of bare wire.
3. Attach connectors (optional) – Attach male or female connectors to the exposed ends if needed.
4. Insulate the ends – Use heat shrink tubing or electrical tape to prevent short circuits.
5. Continuity test – Use a multimeter to ensure the wire conducts electricity properly.
Applications of Breadboard Circuits
Breadboard circuits have various applications across different fields, making them a valuable tool for education, prototyping, IoT development, and component testing. Here’s a detailed look at some of their key applications:
1. Education: Teaching Circuit Design and Electronics
Breadboards are extensively used in educational settings to teach students about electrical circuits and electronic components. They provide a hands-on way to understand fundamental concepts such as voltage, current, resistance, and circuit connections. Schools, colleges, and universities use breadboards in physics and engineering courses to help students build and analyze circuits without soldering. Because of their reusability and ease of use, breadboards allow students to experiment with different circuit configurations, fostering creativity and deeper learning.
2. Prototyping: Testing and Refining Electronic Designs
One of the most significant applications of breadboards is in prototyping. Before manufacturing a product, engineers and developers use breadboards to test circuit designs, troubleshoot issues, and refine their concepts. This is especially useful in research and development when designing new electronic devices. Using a breadboard, designers can quickly modify circuits, optimize performance, and ensure their design works as intended before committing to a permanent PCB layout.
3. IoT and Robotics: Smart Automation and Prototyping
The Internet of Things (IoT) and robotics industries rely heavily on breadboards for building prototypes. Before integrating them into final products, developers use breadboards to test sensors, microcontrollers (such as Arduino and Raspberry Pi), and actuators. Breadboards make creating smart home automation systems, robotic arms, and other intelligent devices easy, providing a flexible platform to experiment with various hardware configurations.
4. Testing Components: Evaluating Resistors, Capacitors, and Transistors
Breadboards are also used for testing individual electronic components. Engineers and hobbyists can check the performance of resistors, capacitors, transistors, and integrated circuits (ICs) before using them in final projects. This ensures that components function correctly and helps diagnose faulty parts in a circuit.
Conclusion
A breadboard circuit is an essential learning and prototyping tool for electronics. It enables rapid assembly and testing of circuits without soldering, making it perfect for beginners and experts. You can design creative electronic projects by knowing breadboard layouts, efficiently using jumper wires, and taking systematic approaches to assembling circuits. Whether beginning anew or building up your skills, playing around with breadboards means the world of infinite possibilities in electronics.