Remote Control Robot for Beginners: A Complete Starter Guide
IEM RoboticsTable of Content
-
The main parts of a Remote Control Robot
-
Building an RC robot with simple RC circuits
-
Best Starter kits to build an RC robot
-
Simple Robotics Projects to Try After Your First Build
-
Conclusion
- FAQs
One of the most fascinating gateways into the world of robotics is a remote control robot. It is essentially any robot controlled by signals sent via a remote control transmitter, which is then interpreted by a machine. Remote robots range anywhere from simple wheeled bots with two wheels all the way to a complex robotic arm, all operated by essentially the same principles as a simple robot controlled by a transmitter to a receiver.
Today, there are more affordable robotics components, open-source code, and ready-built robots that students, educators, and hobbyists alike can enjoy building, or at least learning about, far more so than even ten years ago. It is a hobby well-suited for people, children, and adults who want to experience learning about robotics, do an assignment on robotics, or just build a controllable robot at home with no background required.
The main parts of a Remote Control Robot
When it comes to building an RC robot, you need to know what is included inside. Each part has its own role in order to control the robot and operate it correctly.
Microcontroller (The Brain)
A microcontroller is the processing unit that makes up a robot. This component receives commands from the receiver, reads the command, and sends it to the motors. An Arduino Uno or Nano is a popular option due to its simplicity, and it's wide variety of community support and its reasonable cost. It can also be replaced with an Arduino Uno if more processing power is required.
Motor and Motor Driver
The motors are what make the remote control robot move physically. DC motors are commonly used as the wheels, whereas servo motors are often used for precision control, such as the wheels of the robot or the arm of the robot. The motors need a motor driver to operate it because the microcontroller is not enough to supply the motor with the required. Popular motor driver modules include the L298N, which can control two DC motors and also a servo motor.
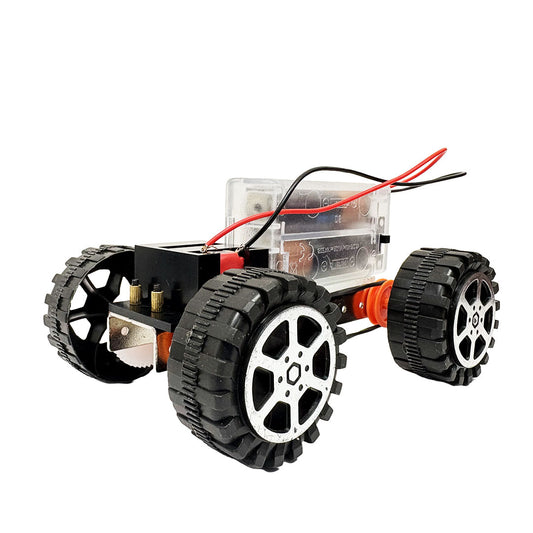
Chassis
The chassis is the physical framework to which all of the robot's components are connected. Simple 2-wheel drive chassis kits are commonly used for the beginner due to it being extremely cheap and also being ready-drilled for the motors to be fitted in. These are readily available to buy online along with the motors and a battery holder.
Transmitter and receiver module
This section deals with controlling the remote control robot using some kind of remote control system. Some common modules include:
- RF 433MHz modules - Basic directional controls, which are very simple and cheap.
- NRF24L01 modules - This module works much quicker than RF 433MHz modules and also allows control over many more channels. It is a 2.4GHz module and has a good range.
- Bluetooth modules (HC-05) - Allow control of a robot through the Bluetooth of your mobile phone. An app must be made to enable this.
- Wi-Fi modules (ESP8266/ESP32) - Allows remote control over the local network or the internet.
Power Supply
Most beginner RC robots have their motors powered by a 7.4V lithium-ion battery pack or a holder with AA batteries. It is important that the power supply is capable of supplying enough current, as the same current can power both the motors and the microcontroller together. A separate power source should also be provided for the motors and the microcontroller in order to overcome voltage drops across the motors.
Building an RC robot with simple RC circuits
Let's have fun and build! The next few steps are going to walk you through the process of creating a basic 2-wheel remote control robot with Bluetooth using your Arduino and some Bluetooth.
Step 1: Gather components
- Arduino UNO or Nano
- L298N motor driver module
- 2WD robot chassis (with DC motors)
- HC-05 Bluetooth module
- 7.4 Volt Li-ion battery pack
- Jumper wires
- Mini breadboard
- Bluetooth RC Controller App for your phone
Step 2: assemble the chassis
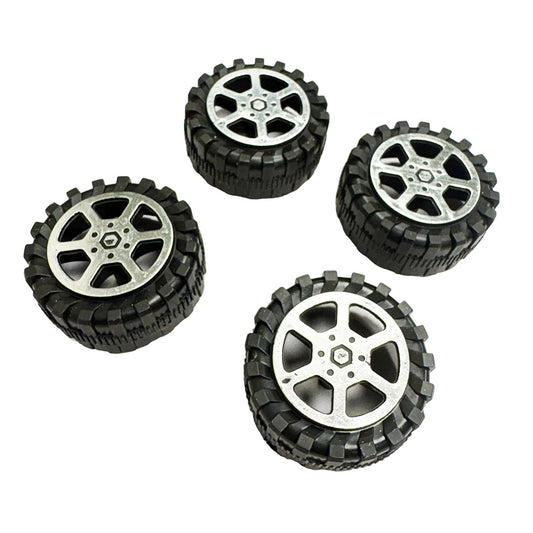
- Fix the two DC motors onto the robot chassis' motor mount and screw in the wheels tightly.
- Fix the caster wheel on the front end of the robot chassis.
- Fix the battery pack holder to the bottom of the robot chassis and place the battery pack into it.
Step 3: wiring for the robot
- Wire up the two DC motors to the output terminals of the L298N motor driver module.
- Wire the L298N's input terminals to two digital pins (you can choose digital pins 2-5) of the Arduino.
- Connect your L298N's power input terminals directly to the 7.4 V Li-ion battery pack.
- Wire the Bluetooth module RX & TX terminals to the corresponding TX & RX pins on the Arduino (do not let them touch the laptop)
- Power your Arduino from the 7.4V battery pack to the Vin pin.
Step 4: code the robot
- Download Arduino IDE and plug in your Arduino.
- Write the code for your remote control robot, or copy one of the many sketches out there online for controlling a 2-wheel RC robot via Bluetooth. These sketches usually have input parameters for transmitting strings, so it would probably be to write a code where you can send "F" and move your robot in the forward direction, with control over the motor direction based on the character.
- upload code to the Arduino through your laptop using the USB wire
- Disconnect the USB wire and then switch on the robot using the battery.
Step 5: control and test
- Pair the Bluetooth module with your phone from your phone's Bluetooth menu.
- Launch the application that you downloaded on your phone, and program the front/back/left/right buttons, assign the corresponding strings, "F" or "R" or "L", etc. That your code is expecting.
- Turn on the robot, and have fun testing it out with all of the buttons. You may need to tune the power levels to your motors to move appropriately; you can test them by increasing and decreasing the values in the Arduino sketch for power levels for robotics for beginners
Best Starter kits to build an RC robot
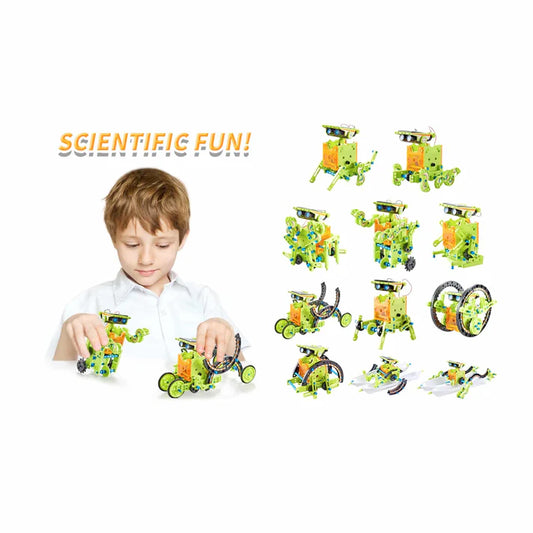
If you like the idea of a clear direction for building your RC robot, the best STEM robotics kits can take the mystery out of picking components and wiring them all up. Which ones are worth your time?
Best Starter Kits for Building Your Own Remote Control Robot
If you just want to jump into building, a good starter stem robotics kit will take away the frustration of buying the right components and wiring them up. Here's what to be on the lookout for;
Features of a good starter kit
- Pre-assembled chassis with motors and wheels – saves time on building mechanics and gives confidence that all the parts fit together and are compatible.
- A microcontroller (ideally an Arduino-compatible board) with some basic code already uploaded to get your robot moving in minutes, as well as an explanation of it.
- A motor driver board and all jumper wires necessary – these parts can be difficult for beginners to source as a group.
- Wireless transmission module ( Bluetooth or Radio Frequency) with some form of remote control(whether it is an app, or another controller you use, you'll know it works).
- Step-by-step guide that covers the physical build as well as diagrams of the wiring and explanations of what the code is doing.
What level of skill are the kits intended for?
Entry-level kits
Aimed squarely at people who have no knowledge whatsoever of how electronics work, they usually have all components pre-soldered and wired with color-coded wires. The code usually uses a block-based language and can be copied and pasted without too much explanation. Generally intended for kids 10 and above, and makers who are complete beginners exploring simple robotics projects.
Intermediate kits for a remote control robot
Require some basic soldering, writing code, or editing code supplied, and involve using more sensors such as Ultrasonic sensors, IR sensors, and even some kind of motor for robot arm rotation.
Advanced kits
The multi-featured remote control robot kits can include robotic arms, a camera module, and even have a multi-terrain robot chassis. Generally aimed at more experienced robot builders, likely for their second or third robot.
Simple Robotics Projects to Try After Your First Build
- Obstacle-avoiding RC robot - add an ultrasonic sensor (HC-SR04) to your existing RC car. When an obstacle comes within a defined range of your robot, you want to stop the robot or turn it away.
- Line following RC robot with manual control - using an IR sensor to detect the black line and using it as the navigation source, and add a Bluetooth to gain the remote control from your cell phone whenever required.
- RC-controlled robotic arm - removing the wheels and the chassis, you'd add a robotic arm consisting of servos (most likely 4 or 5) and a mobile base, with your remote controlled by the already built RF transmitter, which will likely have multiple channels.
- RC Rover with Camera - fix a mini camera module that works with WiFi onto the front of your RC Car, which will then allow you to view what the robot is seeing on a cell phone or laptop, as it drives around your floor.
- Gesture-controlled robot - a substantial step up but very rewarding: In this project, we use an MPU6050 accelerometer as our joystick on a handheld remote. Tilting your hand will tilt the device; this reading will then drive the RC car.
Conclusion
An ideal first project to learn electronics, programming, and mechanical assembly is building a remote control robot from scratch. This project links directly to the theory you are working on, but gives you a working physical result, which is why RC Robots are still among the favorite "starter" robot projects for students in high school, college, and among the hobbyist community around the world.
These skills that you gain in building an RC Robot, like the circuits you are using, the code that you write, and the hardware you will be dealing with, are the basic steps to move on to larger and more complicated robot projects. Starting simple, working diligently, and moving up to more complicated projects will result in an excellent robotics beginner.
FAQs
Q1. Which is the most straightforward remote control robot to build for a beginner?
The simplest is a two-wheeled Bluetooth robot using an Arduino, motor driver and Bluetooth module as there are very few parts, well-documented, and you use your phone to control it.
Q2. Do I need programming knowledge to build an RC robot?
Not strictly. Most of the beginner robots have pre-written code supplied so it's possible to just put it together. A little modification of the code is fine to start with.
Q3. What is the best communication way for a beginner RC robot?
Bluetooth is the easiest way for beginners as it's very easy to pair with and it's very well-supported as far as tutorials go, and obviously phone-controllable.
Q4. How much is a basic remote control robot going to cost?
It would cost around 800 - 1,500 in India or $15-30 otherwise, depending on how and where you buy components.
Q5. What is a STEM robotics kit and is it worth buying?
A STEM robot kit is one that supplies you with all the components to build a robot, plus the wiring and sample code, to help a beginner. For anyone beginning, it's well worth it, as there is less searching for parts and no chance of them not being compatible.

By: Asmita Ghosh